Building a S3 File Download Service Using Spring Boot and Minio Client
If you have a medium.com membership, I would appreciate it if you read this article on medium.com instead to support me~ Thank You! 🚀

Intro
A file download service is a very common service, and you can probably find tons of tutorials online on how to build a file download service. This article aims to provide a quick code reference on how to design and implement a file download service that can handle large file downloads and multiple file downloads as a zip from S3 using Minio Client SDK.
Note: At the point of writing, I am using Spring Boot 3.2.4 and Java 17.
File Download Series
- Building a S3 File Download Service using Spring Boot and Minio
- Exploring File Download Reverse Proxy with Nginx + Lua + Redis
Design Considerations for File Download Service

The file download service is a server-side application, in our case built with Spring Boot framework, that acts as a middleware between the client (web browser) and the file storage (s3). When designing a file download service, some considerations made include:
- Security - Authenticating download requests, encrypting downloads, digital signatures, and secure protocols (eg. HTTPS) to prevent intercepting and tampering with downloads.
- Scalability - It is easy to horizontally scale the file download service during peak download periods.
- Performance - Separating the file download service as a dedicated service ensures that other API functionalities remain responsive during peak download periods.
- Large Files - Instead of loading the entire file into the memory of the file download service, a streaming approach should be used where the service sends the file content directly to the client in chunks.
- Offloading Download to S3 - One option is to make use of S3’s presigned URL to offload the download request to S3 directly. This provides direct access and a more reliable download.
For this article, I am mainly focusing on points 4 and 5.
Getting Started
Step 1: Create Spring Boot Application
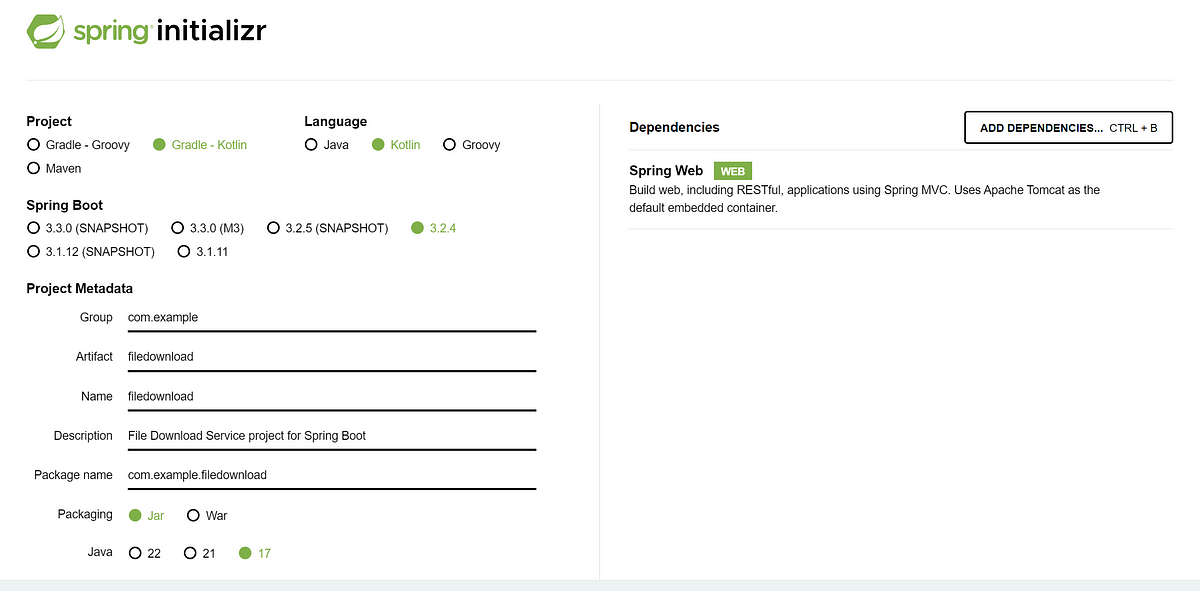
Head over to https://start.spring.io/ and initialize a Spring Boot project. Minimally, you will require Spring Web dependencies.

Step 2: Setup Minio
For demonstration purposes, I will be using Minio as my S3.
Step 2a: Setup Minio (s3) using Docker
To set up our S3, we can use the following docker-compose file to quickly run a Minio Docker instance.
# docker-compose.yaml
version: '3.7'

services:
  minio:
    container_name: minio_server
    image: minio/minio:RELEASE.2024-04-18T19-09-19Z
    ports:
      - "9000:9000"  # For connecting to Minio API
      - "9001:9001"  # For viewing Minio Web Console
    volumes:
      - ./storage:/data
    environment:
      MINIO_ROOT_USER: admin
      MINIO_ROOT_PASSWORD: password
    command: server --console-address ":9001" /data
# Create and Start the Docker Containers in Background Mode
docker-compose -f minio-single-node-docker-compose.yaml up -d

# View the Docker Container Instances
docker ps -a

# You should see the following
CONTAINER ID   IMAGE                                      COMMAND                  CREATED         STATUS                    PORTS                                                           NAMES
bf9d43b04476   minio/minio:RELEASE.2024-04-18T19-09-19Z   "/usr/bin/docker-ent…"   3 seconds ago   Up 2 seconds              0.0.0.0:9000-9001->9000-9001/tcp, :::9000-9001->9000-9001/tcp   minio_server

# To delete the Docker Container Instances
docker-compose -f minio-single-node-docker-compose.yaml down -v
Step 2b: Add Minio Java SDK as Dependencies
In your Spring Boot application, you will need to configure a Minio Client to communicate with the Minio that you have created. We will be using the MinIO Java SDK (io.minio:minio) for Amazon S3 Compatible Cloud Storage. Add the dependencies to your build.gradle.kts or pom.xml.
# build.gradle.kts
dependencies {
   ...
   implementation("io.minio:minio:8.5.9")
   ...
}
Next, add the connection properties in your resources/application.yaml and configure a MinioClient for communicating with the Minio that was created in step 2a.
# application.yaml
object-storage:
  endpoint: http://localhost:9000
  access-key: admin
  access-secret: password
  bucket: storage
@Configuration
class MinioClientConfig(
    @Value("\${object-storage.endpoint}") private val s3Endpoint: String,
    @Value("\${object-storage.access-key}") private val accessKey: String,
    @Value("\${object-storage.access-secret}") private val accessSecret: String
) {
    @Bean
    fun minioClient(): MinioClient {
        try {
            return MinioClient.builder()
                .endpoint(s3Endpoint)
                .credentials(accessKey, accessSecret)
                .build()
        } catch (e: Exception) {
            throw RuntimeException(e.message)
        }
    }
}
With that, we have set up a Minio on localhost and configured a Spring Boot Application (AKA our file download service) that can connect and communicate with the Minio. Next, let’s look at how to implement the download logic.
Step 3: Writing File Download Logics
As mentioned in the design considerations above, simpler file download services typically load the entire file into memory before sending it to the client. This usually happens when the implementation is reading the file content into a byte array or string before writing it to the HTTP response stream.
However, this will cause out of memory (OOM) issues easily when we are dealing with multiple large file downloads during peak periods. Hence, we will make use of HttpServletResponse, an interface that enables us to control the HTTP response that is sent back to the client’s web browser, to write the file content (bytes) directly to the output stream. So file content is streamed directly from Minio to the client’s web browser.
Step 3a: Single File Downloads
We can make use of IOUtils.copyLarge(), a method provided by Apache Commons IO library, which is designed to copy large data from one input stream to one output stream.
@Service
class StorageService(
    private val minioClient: MinioClient,
    @Value("\${object-storage.bucket}") private val bucket: String
) {
    fun downloadFile(fileId: String, response: HttpServletResponse) {
        // Set File Content
        val statArgs = StatObjectArgs.builder().bucket(bucket).`object`(fileId).build()
        val stat = minioClient.statObject(statArgs)

        // Set Response Header
        response.contentType = stat.contentType()
        response.addHeader(HttpHeaders.CONTENT_DISPOSITION, "attachment; filename=\"$fileId\"")

        // Download File
        val getArgs = GetObjectArgs.builder().bucket(bucket).`object`(fileId).build()
        val inputStream: InputStream = minioClient.getObject(getArgs)
        IOUtils.copyLarge(inputStream, response.outputStream)
    }
}
Note:
org.apache.commons.io.IOUtilsdoesn’t seems to work well withjakarta.servlet.http.HttpServletResponsewhich is the default in Spring Boot 3.0. I will probably update this piece of code after researching abit more.You can refer to the changes here — https://github.com/spring-projects/spring-boot/wiki/Spring-Boot-3.0-Migration-Guide#Jakarta-EE
Step 3b: Multiple File Downloads as a Zip
When dealing with multiple files, it is better to download the files from Minio and add them to a zip file. The file download service then writes the zip file to the output stream of the HTTP response, without storing the zip file in memory.
@Service
class StorageService(
    private val minioClient: MinioClient,
    @Value("\${object-storage.bucket}") private val bucket: String
) {
    fun downloadMultipleFiles(fileIds: List<String>, response: HttpServletResponse) {
        // Set Response Header
        response.contentType = "application/zip";
        response.addHeader(HttpHeaders.CONTENT_DISPOSITION, "attachment; filename=\"files.zip\"")

        // Create Zip File and write to Output Stream
        val zipOut = ZipOutputStream(response.outputStream)
        fileIds.forEach { fileId ->
            val args = GetObjectArgs.builder().bucket(bucket).`object`(fileId).build()
            val inputStream = minioClient.getObject(args)
            val zipEntry = ZipEntry(fileId)
            zipOut.putNextEntry(zipEntry)
            StreamUtils.copy(inputStream, zipOut)
            zipOut.closeEntry()
        }
        zipOut.finish()
        zipOut.close()
    }
}
Step 3c: Generating Presigned URL

Instead of using the download service as a download middleware between the client and S3, we can generate a temporary presigned URL and offload the download to S3.
@Service
class StorageService(
    private val minioClient: MinioClient,
    @Value("\${object-storage.bucket}") private val bucket: String
) {
    fun generatePresignedUrl(fileId: String): String? {
        val args = GetPresignedObjectUrlArgs.builder()
            .bucket(bucket)
            .`object`(fileId)
            .method(Method.GET)
            .expiry(5, TimeUnit.MINUTES)
            .build()
        return minioClient.getPresignedObjectUrl(args)
    }
}
Step 4: Configuring the Rest Controller
Lastly, let’s generate the APIs for calling the download logic we implemented in step 3. To do that, simply create a Rest Controller.
@RestController
@RequestMapping("/api/v1/download")
class DownloadController(private val storageService: StorageService) {
    companion object {
        private val logger = LoggerFactory.getLogger(DownloadController::class.java)
    }

    @GetMapping
    fun downloadFile(@RequestParam fileId: String, response: HttpServletResponse) {
        logger.info("Received request to download file - $fileId")
        storageService.downloadFile(fileId, response)
    }

    @GetMapping("/presigned")
    fun getFilePresignedUrl(@RequestParam fileId: String): ResponseEntity<String> {
        logger.info("Received request to generate presigned url for file - $fileId")
        val presignedUrl = storageService.generatePresignedUrl(fileId) ?: return ResponseEntity.notFound().build()
        return ResponseEntity.ok(presignedUrl)
    }

    @GetMapping("/zip")
    fun downloadMultipleFiles(@RequestParam fileIds: List<String>, response: HttpServletResponse) {
        logger.info("Received request to download files - ${fileIds.joinToString(",")}")
        storageService.downloadMultipleFiles(fileIds, response)
    }
}
Testing Downloads
To test your service, the simplest way is to open up a web browser, and enter the following URLs!
# Single File Download
http://localhost:8080/api/v1/download?fileId=yourfile

# Multiple File Download
http://localhost:8080/api/v1/download/zip?fileIds=yourfile,yourfile2
http://localhost:8080/api/v1/download/zip?fileIds=yourfile&fileIds=yourfile2

# Presigned Url
http://localhost:8080/api/v1/download/presigned?fileId=yourfile
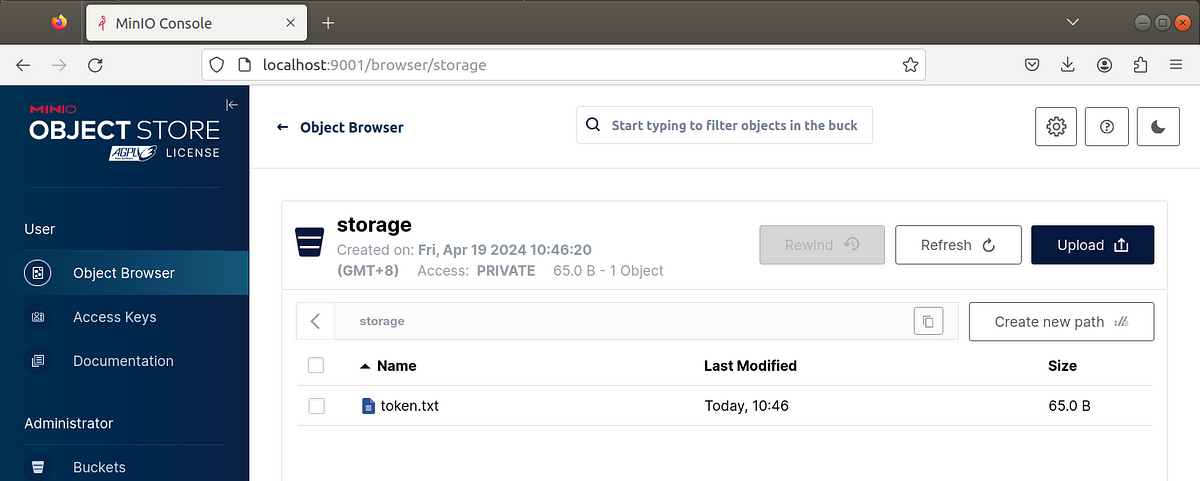
Note that you will need to first upload your files to Minio. You can access the Minio web console by entering http://localhost:9001 and login with username admin and password password which was configured in the docker-compose.yaml file in step 2a.

Conclusion
This concludes the file download service implementation. This is nothing complicated but I hope it gives you a good sense of how to handle large file downloads efficiently with Spring Boot and Minio.
Refer to the GitHub repo below for the codes.
Thank you for reading till the end! ☕
If you enjoyed this article and would like to support my work, feel free to buy me a coffee on Ko-fi. Your support helps me keep creating, and I truly appreciate it! 🙏